Showing posts with label hallway. Show all posts

Friday, 19 February 2016

The Hallway - The Final Reveal

The day has finally come!  The reveal of the hallway.  It's only been over a year since we started working on it, but good things come to those that wait!


Telephone table from Indigo Furniture. I actually won this in a competition a few years ago, which is  the best (and probably only) competition I've won.  I LOVE it.  
The hanging decorations were gifts on our wedding day, as was the photo frame.  The orchid was a present from the hubby a few years ago which I have managed to keep alive!


The sanded and stained floor and the plush new grey carpet runner.


My lovely bunny prints from HAM, which were gifts from my parents for my last birthday and Christmas.  Black frames, RIBBA from Ikea.


New radiator installed.


New turtle mat to catch dirt on shoes - Christmas gift from my parents. Exciting times when you ask for a doormat for Christmas!


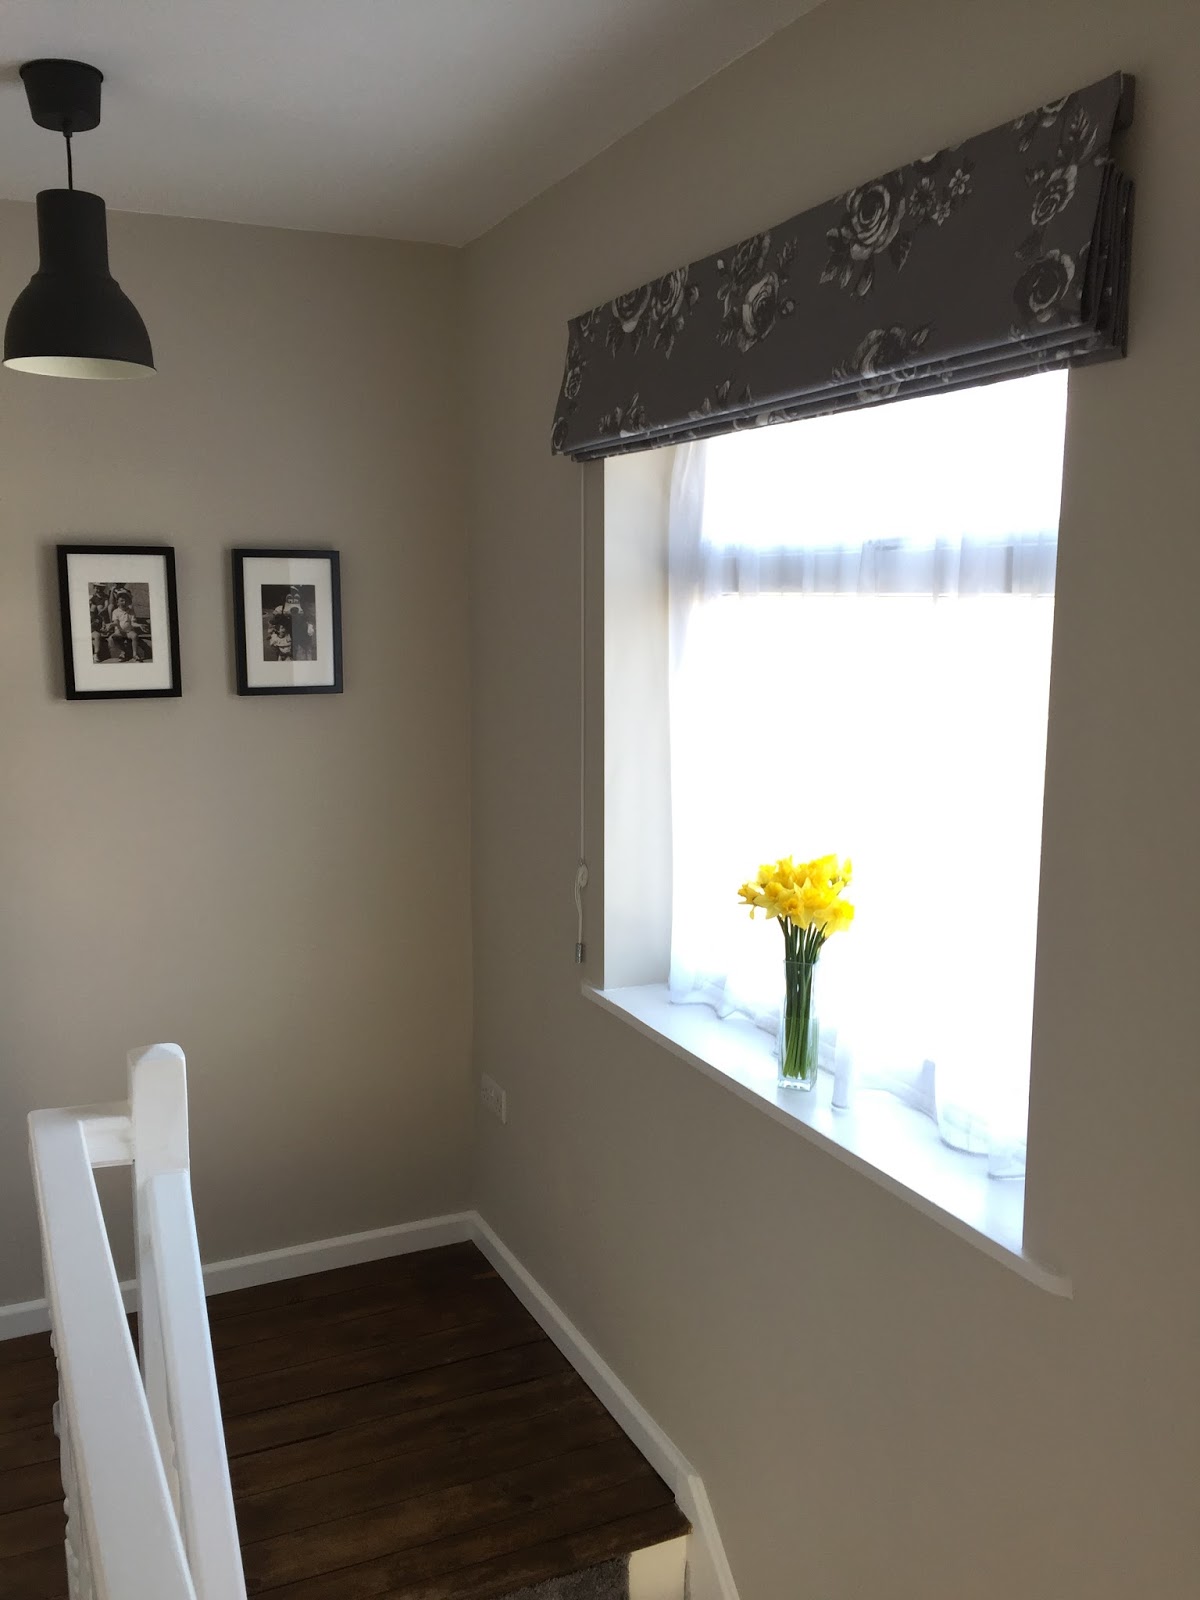
The blind was handmade by me :) 
The light fitting is a HEKTOR from Ikea (was a bit fiddly to fit!)


Yummy floor!


Again, black frames, RIBBA from Ikea (£4 each).  Funny childhood photos, priceless.


New white painted door frames and staircase


The new loft hatch - so smooth!  No more artex!


RIBBA Frame, £7 from Ikea.  Print in frame, printed for free.


Just in case whether you were in any doubt about whether it's an improvement over what we had before!  Here it is in all it's ghastly horror.  Most of these are from moving in day so include the old bathroom too!


I'm so so pleased with how it's turned out

Costs

In terms of costs, I haven't added up every penny, but here are some ball park figures:

Plastering: £780
Paint: £150
Carpet: £90 plus £50 fitting
Blind: £35
Flooring (sanding): £100
Flooring (stain and varnish): £55
New radiator: £90
Under stairs storage: £100
Lighting: £36

Total: ~£1500

Eek! That's a lot of money!  I don't know if we have necessarily added £1500 to the value of the house, but my gosh does it look a heck of a lot better. A lot less unwanted texture!  Apart from the plastering which was a HUGE part of the budget, I really don't think we couldn't have done it any cheaper - we did all the plumbing, sanding, painting, decorating and sewing ourselves!

Which makes it a great time to start a plastering course this weekend - yay!   What have you got planned for the weekend?

Wednesday, 10 February 2016

Under the stairs storage

The original plan was to box under the stairs in, and to create a functional storage space within. 

We have deviated from that plan, however we have created a much more functional storage area. Let me show you our progress...

This is what we started with. The bit at the top had been covered by a painted piece of wood, but I had far too eagerly ripped that down before I took this photo.


We had stained the floor under the stairs (if you remember, this is where I started to stain to test the strength of the colour) but there was an area, to the bottom left of the photo below, that we were unable to sand. It was black, and every time we went vaguely near it with the sander it just ripped the paper to shreds instantly. As it wouldn't be seen in the grand plan though, we didn't worry ourselves too much about it.


I started by designing the storage. I loved the ALGOT system by IKEA, and it was so flexible that it could easily meet our needs.  I wanted some hanging space for coats, lots of shoe storage, and space for shopping bags and cycling accessories.  

As a woman, you might assume that all that shoe storage might be 90% for me. Well you would be wrong! It turns out I married a man with more pairs of trainers than there are days in the year!  It also has to be 'easy storage' - I loved the idea of shoe racks so that all the shoes are nicely lined up - but I know if there is any effort above minimal to get the item back to its rightful place, it will just end up in a heap on the floor. The solution for the shoes was three large plastic boxes (two for him, and one for me) in which shoes could be put in with very little effort. Not the neatest/best solution for shoe storage, but it's the solution that gives me the best chance of getting a house not littered with shoes!!

I designed the whole system using CAD on my computer - the benefits of being an engineer!  I tweaked and tweaked it, until it looked just right.


I started by sawing out the cross bar that was installed, as I intended to move it higher up.  I wanted to fit a shelf in here, but also the other criteria was that the ironing board had to fit here too underneath the shelf.  Too make the shelf usable, I needed to move this bar up.


I used some scrap bits of wood I had in the garage to make shelf supports (first checking how high I needed them such that the ironing board would fit under).  I did the same on the other side too.


I made a shelf out of two pieces of scrap wood I had in the garage.  The width of the two boards together was almost perfect, I just had to cut the length of them down slightly.  I also had to do a few cut outs from the ends to fit around all the obstacles at the edges, like cable ducting.  I did this mostly with my circular saw, and then finishing with a hand saw.

I also reinstalled the top covering piece of wood, but I had to trim this as it was much too tall.  Again, another easy job for the circular saw.  I screwed this into place to the wood battons on either side.  I decided not to reinstall the cross baton as the sides were more than chunky enough to screw into (that and I only had one bracket and would have needed two to do the job!).


Here is a close up detail of some of the cut-outs.  You can also see that the wood definitely was scrap as I have gotten stain all over it using it as a resting plank for another project!  A bit of sanding with a coarse piece of sandpaper by hand and it came up a treat (or at least a treat enough to paint!)


I additionally used a piece of plywood to board off the bottom section.  This is because the bunnies like to play hide and seek, particularly in this exciting part of the house.  This is also the part of the house that our mains electric cable comes in to the fuse box at bunny height, so I really don't want them munching on it!


A bit of caulk and paint later, and it's looking much cleaner and fresher:


This detail is on the left hand side of the cupboard as you look at it head on, but you would have to crane your head around the corner to see it.  I'm totally in love with the exposed brickwork though - I might need to get some of this going in my next project!


I also installed the Ikea storage system for coats and shoes.  This was very straightforward - you really can;t go wrong with a set of Ikea instructions.


I think ideally I will have a curtain over the ironing board section in time, but I want to make sure it looks right, so I will take my time to source/make the right one.

I changed my mind about boxing this space in, as I thought that if it was boxed in, it would encourage us to open the door, throw our stuff in, and then close the door.  By keeping it open, it encourages us to keep it tidier.

Total Costs for the project:

Shelving in cupboard - scrap wood already owned £0
Wood for cupboard - part of original cupboard £0
Paint for cupboard - bought as part of hallway project
Ikea ALGOT system and plastic boxes ~£100

Total = ~£100

What is the best way you have found to store all of  your coats and shoes?

Wednesday, 27 January 2016

Fitting the new hallway skirting board

I have had this post saved in my drafts for ages, so not sure why I have never published it.  As you may have guessed, I did this work a couple of weeks/months ago so not the current state of the hallway, which is practically finished! Yay!

So the hallway skirting board...

I started with none as I had ripped out all of the old skirting board when we demo-ed the room (all ghastly, none of it matched with each other - really weird).  It's not the house for lovely period skirting, so I went for a nice rounded top edge skirting.

I had a few obstacles though - one of which was the front door plinth.


A quick mark up in pencil and I was on the hand saw.  (I thought it might have been a bit overkill to get the circular saw out for this one :-D )


Perfect.  (Except the gap above the skirting board to the door architrave obviously... to be fixed with caulk at a later date)


The walls were by no means straight.  I mean, who actually has straight walls anyway?  Once I added adhesive to the backs of the boards though, it pulled it in a bit, and the gap behind the board reduced which was good - not so much filling to do later!


This was the bit at the base of the stairs.  This was my first go of caulking the gap to try and make it match up.  There were several more rounds of sanding, caulking, sanding, caulking etc. to get it to a finished product.


This is my patented "skirting board holder whilst the glue is drying" device. A brick!  Haha! Although the special bit is the piece of kitchen towel around it, as I had just gotten it out the garden and I didn't want the brick to mark the skirting board.


I also added a small strip of moulding next to the front door.  There was a big old gap here and the good work of our insulating under the floorboards was being completely undone as a gale force draught was coming up this gap.  I went on to stain this moulding to match the floor so it blends right in - I though painting it white might make it look a bit weird.


I only had one straight join in all my work, which was fab news (although i did have loads of corners). There is nothing that a bit of caulk can't solve.  This was the first round before sanding, caulking etc...


I ummed and ahhed about using grip adhesive or nailing the skirting board in.  I think I would have made a right old mess with nails, and there were very few places that I would have actually been able to nail to.  With my brick 'device' though, the glue worked out just fine.  I used Gripfill and just squiggled it on the back of the board - more when the gap it needed to join was wider.

I appreciate there aren't many progress photos of this - I actually did it whilst an Anthony Nolan nurse was in the house giving my husband injections (he donated stem cells in December - so proud of him), but needles make me hit the deck, so I was furiously busying myself trying not to see/hear/think about needles and injections!  I am such a pansy when it comes to anything gory, and by gory, I mean a drop of blood and I'm out, haha!

I used my awesome circular saw to cut the lengths right as my saw has a 45 degree function on it which was great.  I'm usually quite good with visualizing stuff, like those diagrammatic reasoning tests they make you do at job interviews?  Anyway, on this day I was a complete space cadet and I just could not cut it the right way - I had to do so many cuts twice.  Maybe it was the needles on the brain... Or maybe I'm just a full time space cadet!

Once the adhesive was dry (I left it for 24 hours), I used Frog Tape along the top of the skirting and used some decorators caulk to fill in any gaps.

Total Costs of Project

Tools
Circular saw - already owned
Hand saw - already owned
Sealant gun - already owned

Materials
Wickes Skirting Board Primed MDF (14.5x69x2400mm), Pack of 5  £23.45
Wickes Pine Quadrant Moulding £4.05
Gripfill Adhesive   £2.49
Decorators Caulk   £1.95
Frogtape   £5.99

Total Cost = £37.93


The final reveal of the hallway is within touching distance!


Friday, 15 January 2016

Hallway - To Do List Update No.2

  1. Get the radiator back on the wall.
  2. Take up the laminate flooring
  3. Cut back bathroom flooring upstairs to fit nicely in door threshold in prep for floor work 
  4. Insulate under the ground floor (I'm fairly sure this hasn't been done, but who knows!) 
  5. Replace loft hatch, and sort out plaster around it. 
  6. Sort out the dodgy patch on the ceiling 
  7. Sand floor (upstairs and downstairs) 
  8. Stain and varnish the floor 
  9. Sand down woodwork on stairs ready for repainting
  10. Finish stripping door frames 
  11. Attach skirting board to all walls
  12. Prime and paint all woodwork (this is going to be a big job!) - by the end of this week I am determined to have finished this job!
  13. Paint the two internal doors downstairs
  14. Fit new handles, hinges etc. to the downstairs doors
  15. Carpet runner for the stairs 
  16. Make blind for upstairs window Supplies purchased - just need to find time to make it!
  17. Make curtains for front door Not sure if we will have curtains anymore - it looks fine without them
  18. Buy frames and hang pictures 
  19. Build out under the stairs to enclose the space (my first go at serious carpentry!) Not sure if we will do this now, but I've still got a bit of woodwork to do here even if we don't.
  20. Install storage system under the stairs
  21. Revel in the prettiness of the hallway when it's all done! :)
I'm not going to lie, I've done number 21 many, many times already, even though it's not yet all done! This week I will finish the painting - I have promised myself.  Stay tuned next week to see if I manage it!

We are getting so close now - just need to sort out the downstairs doors now really, but upstairs is all done (once painting is complete!)

Wednesday, 13 January 2016

Stripping the last of the hallway woodwork

It's taken me weeks and months to build up to finish this job, because it's just. so. ghastly.  I HATE stripping paint, and I really dislike sanding - it's just so dusty.

But as I'm starting to run out of jobs to do in the hallway, I'm starting to run out of excuses.  That and I had bought the carpet so I needed to crack on and get the painting done.

This is how I had left it before I painted the walls, so the majority of the architrave was done, but I still had the doorstops to do.


I tried to protect the flooring a bit with an old towel, but it still made a big old mess.


Years and years of layers and layers of paint...


The greeny coloured layer was really stubborn, to the point where the heat gun didn't seem to be shifting it.  I stopped for a rest and just thought I'd give it a go with the mouse sander with a really coarse grit sandpaper (40), and like magic, it all came right off - yay!  I'd already taken off layers and layers of paint before I got to this point, so I don;t think a mouse sander would have been time efficient without the heat gun first, but just look at this beauty.  Bare, naked wood.  All ready for a fresh lick of pure brilliant white paint.


The mess along the way...


I had to take off the kitchen door to get to all the nooks and crannies, and it's still off its hinges until I finish painting. Probably should get round to doing that...

All in all it took me a whole day to do 5 door frames (and remember that's 5 half, half, door frames really as I was only doing one side, and I had already done most of the architrave bit).  I wore safety glasses and a dust mask, but I think I should have been a bit more careful.  I was so ill that night and for a few days afterwards, that I'm not sure if I fumigated myself or something.  Not good.

But it's done! Finally!

I can;t believe how much I underestimated the job that is tackling a hallway/stairs.  It's just such a huge space as it's so tall, and it has sooooo many doors!  Ours has 8 in total - nuts.  This means lots of architraves, lots of corners, lots of tricky bits.  And stairs also mean lots of spindles to paint!  But I love how far it has come, just the last little bit to go now.

Which jobs have you done that you completely underestimated the time investment?


Thursday, 7 January 2016

The stair carpet is finished!

We finally have stair carpet!  Yay!  It's like walking on a cloud :-D

Let me tell you the story....

Sometime back in November time, we were in a retail park and stumbled into one of the big furniture shops that sells everything from dining tables to carpet.  We had a good stroke of all the carpets (sounds creepy but a bit of a must!), and the hubby picked the one he liked.  It got the thumbs up.  I wasn;t sure of the colour to start with but it grew on me the more I thought about it.


But at £26.99 per metre squared, I was left reeling at the price!  We didn't need much to make a runner, but because of the roll widths of the carpet, we would be looking at £200+.  Eek!

I took the name and the colour of the carpet though, and did some googling on the way home.  I found out some online stores that give the same carpet a slightly different name at a much reduced price. Around £14 per metre squared - much more tolerable.

I went into a local carpet shop to enquire about getting the edges whipped and getting it fitted.  The guy in the shop then went on to tell me all the pro's and cons' of getting the carpet whipped vs. folding the edges under.  What I though was going to be a straightforward conversation then left me spiraling with more decisions!  The main con which he kept emphasising was how easily the edge of the whipping can start ravelling if you catch it with the hoover or something.

I went away and ummed and ahhed and decided to go for the folded option.  But then we struggled to find a fitter!  At last yesterday we had someone round to fit the carpet.

Let's just remember what it looked like before:


And now!  The pile is quite deep which gives it a bit of colour variation as some parts are flattened and others aren't.  I don't think I mind that, but it was a slight concern when we bought it as I wonder how it will look with time. I guess only time will tell!


I must admit, the first thing I saw when I walked in was the bottom step:


Where it has been nailed at the bottom, it doesn't look quite right, almost like it has been pulled in slightly the wrong direction.

Apart from that, I'm really pleased with it, and it's a great way to start progress on the house in 2016!

Total Costs

Carpet - £89 incl. delivery
Underlay - Free, left over from our bedroom carpet
Carpet grippers - Free, left over from previous project, and we retained the ones we took off the stairs for re-use.
Fitting - £50

TOTAL = £139

How are your projects coming along?


Wednesday, 2 December 2015

Staining and varnishing the hallway floor

It's time to finish the floor!  We went for dark teak in the end, which in the samples looked great.  But the sample had been watered down so I had a bit of a test run to see how much to water down.  I went for 1 part stain and 1.5 part water.  As it is a water based stain, the instructions said that you could dilute with water.

But still...


Eeek! So dark!  At this point I panicked.  But I had done too much to go back, so onwards I went!


I started under the stairs which would hopefully be hidden long term to figure out how much to water it down and how to apply it.  I also tried wetting the brush as well as already having the stain watered down, but it was too hard to apply consistently.


It's not incredibly environmentally friendly, but I mixed up the stain in a foil tray.  It was just the right size to hold as much as I needed, but also small enough to be portable.  It is a bit lightweight though so I did have one incident where I accidentally knocked it over :-s


This was after the stain had dried, and you can see it has mellowed a heck of a lot since it first went on - phew!


Next up was varnishing.  I used the complimentary Manns Extra Tough Floor Varnish, to go with the Manns Pine Floor Stain I had used earlier.  It comes in Matt, Satin or Gloss, but apparently 3 coats (the recommended number of coats) of Matt is roughly the same sheen as 1 of satin, so we went for Matt.  We are not a high gloss family!  I find gloss things just show up so many imperfections, so if I could avoid that if possible (knowing there are plenty of imperfections on the floor) then that would probably be best.

I made sure to de-nib (rub down any raised grain) between coats too, with a pad that had been recommended during checkout of buying my supplies.  I'm not sure if it made any difference but I did it anyway.

The stain has made the floor go slightly darker again, which is a slight shame as I loved the colour it had dried to after just the stain.  Saying that though, I still love it a heck of a lot more than the original laminate that was there when we moved in!


The stain and varnish only took an hour to dry per coat so very quick really, but it has still been super tricky to try and get all the coats done!  If it was a spare bedroom you would just paint yourself out the rrom and shut the door.  As this is the hallway, it's so hard as you need to use it all the time!  I ended up varnishing myself to bed, or varnishing my way out to work, so that it would have ample time to dry before I needed to walk on it again.  There was one morning that I was up at 5.30am varnishing the floor before I went to work - nuts!  I still have one more coat to do on a small area downstairs, but the rest of the hallway and landing have had the full 3 coats so I think that's pretty good going.